Showing posts with label 1870s. Show all posts

Friday, October 16, 2015

Crimson Peak review


Kerry and I went to an early Thursday night showing of Guillermo del Toro's new movie, Crimson Peak. Ever since some of the first production stills came out in late spring 2014ish, I've been looking forward to this movie. I wasn't sure about the whole horror aspect with creepy shadow things, blood everywhere, and the sinister house only because I'm not big on that movie genre. BUT IT TOOK PLACE DURING THE VICTORIAN PERIOD! Instantly sold.
Crimson Peak 2015
Mia Wasikowska (Jane Eyre 2011) stars as the main lead, Edith Cushing, a young woman who finds herself drawn towards a young baronet visiting America from England. He seems great, but there's that lurking air of mystery that there's more to Thomas Sharpe's story than what he's revealing. After her father's mysterious death though, Edith finds herself heading off to Allerdale Hall with Thomas. Let's be honest though, where Tom Hiddleston is concerned, it's easy to completely lose our minds and follow him anywhere without any second thoughts.
We've only just met, but can I put MY hands around you?
Yes, Tom Hiddleston (swoon) of Avengers fame is in this film.

Sunday, June 29, 2014

HSF - Challenge #13 Under $10

Challenge - Under $10

Fabric - 100% cotton reproduction fabric from Windham fabrics. Print is dated for 1845-1865

Pattern - Heavily modified Garibaldi Blouse (TV441) pattern from Truly Victorian

Year - 1850s-1870s, no specific year

Notions - Buttons and poly thread

Hours to complete - About 18

First Worn - Just for photos right now. Still have to make other things to go with it.

Total Cost - Only $0.75. Fabric was in my stash, and thread was leftover from another project. Buttons I found on clearance at the fabric store.

How accurate is it?
To be honest, not really sure. I scoured the internet trying to find photos of frontier style work blouses, but really couldn't come up with anything. As work blouses, these garments were usually worn until they were worn out then discarded, so there are few originals still in existence. Photos did not help either since most frontier/pioneer photos are of families in their Sunday best, not their work clothes. Using other existing reproductions, I heavily modified an existing pattern which is very historically accurate in design.
Lucky 13, I managed to get this challenge done on time! I've been wanting to do a dressed down outfit for a long time (hoop skirts, petticoats, and yards of material can be cumbersome sometimes). I bought this fabric about three years ago with the intention of using it for a bodice or blouse, but never had any firm plans until now. The outfit I finally put together in my brain consisted of a brown skirt to go over a corded petticoat with a simple cotton work blouse with roll-able sleeves.

Pioneer Blouse
Recollections
Blouse
Recollections
Since it was in the stash, I started with the blouse. As mentioned above, there were very few original examples or photos to work from, so I looked at a few reproductions and just sort of started mashing designs together using the Garibaldi blouse pattern as a base. 
1861 Garibaldi Blouse
Garibaldi Blouse TV441
The first change I made was to the chest area. Smashing together different sizes and measurement adjustments, I took the chest in so it wouldn't be as loose fitting and shortened it about 2 inches.

I did the same with the sleeves, taking them in about four sizes so they wouldn't be as puffy, a characteristic of the Garibaldi blouse. The sleeves were also shortened about 4 inches not only to reduce more of the pouf, but due to material shortages.
Original sleeve pattern over the shortened fabric
When I bought my fabric eons ago, I only grabbed 3 yards of it, figuring there would be enough. Right... I used every inch along the length of the fabric with less than 1/4 inch between pieces to maximize space. I even had to piece together the neckband piece.
The other major change I made was to the cuffs. I widened them considerably and added 1" to the length so the ends would overlap. I also widened the placket which would allow me to roll the sleeves up when unbuttoned.
Finished sleeve cuff
After everything was sewn together and stitched down all the loose edges, I added my awesome clearance buttons. When shopping at the store, I had found one style that was okay, but then I found these in the clearance which went nicely. I went ALL of the clearance buttons to find more and lucked out, finding just enough for what I needed for this project.
Total cost came to $0.75. Yippee!
I opted for modern technology when putting in my buttonholes, using my handy dandy buttonhole foot on the sewing machine. I know I need to eventually look into making buttonholes by hand, but decided it wouldn't be on this project at this time.
Buttonholes on cuff
All the buttons are attached by hand though to ensure that they stay attached to the blouse and I finished off all my open edges with a small whipstitch to keep everything in place.
For starting without a mockup, the pattern size mashup turned out very well along with the fit. Although it's still not as fitted as I want through the waist area, I figure I could easily add in some darts if I find the extra material is bothering me too much. Yay for finishing though, since HSF challenges will have to be set aside for right now.

Monday, May 26, 2014

HSF - Challenge #9 Black & White

Challenge - Black & White

Fabric - Poly/cotton broadcloth blend

Pattern - Truly Victorian Petticoats pattern (TV170)

Year - Natural Form period, about 1876-1882

Notions - Hooks and eyes for the waistband

Hours to complete - 14

First Worn - For waistband measurements. Will be wearing soon as I work on construction a Natural Form dress

Total Cost - $0, all materials were already in my stash and the pattern is one of my basics that I use frequently.


How historically accurate is it?
The pattern I use matches the silhouette needs of the Natural Form period with a slim front and some fullness towards the back. Everything is machine sewn however, so I don't know how accurate that would be in comparison to an original from that same time.

 
Yargh, I've really been slacking for my May posts. On the plus side though, I finished an item off the aforementioned project list. Double bonus, it works for one of the challenges! It's a few days late, but given my recent history with project issues, I'm not going to worry too much about being a little behind (still working on challenge #5 and #7).

The Natural Form period is one of the few areas of the Victorian Era that I don't have a dress from so I decided to make one up. Like many projects though, you have to start at the basics. In this case it was by making a petticoat. All the ones I currently have are fitted to go over hoop cages or bustles so there's a lot of extra material in them. The point of the Natural Form period is that things are very natural meaning there's very little modification to the silhouette outside of the corset.

Examples of Natural Form dress - Image via Pinterest
I dug out from my trusty TV170 pattern, which I use for most of my petticoats since it's a very universal, and managed to find the right amount of fabric in my stash then got to work.

It took a couple of nights to get everything pinned together and sewn because I like to pin and set my own ruffles rather than try to use a running stitch. The process can be very tedious at times, but the result is certainly worth it in my opinion because the ruffles are usually evenly balanced the entire length of the seam.

Hand pinned ruffles along lower tier

When going through the sewing machine, I just guide the fold in the direction I choose or press them flat.

Although Natural Form is known for some of the long, trained skirts with oodles of frills (see the above fashion plate for example), I opted to go with an untrained petticoat from the standpoint that it would be able to go under other costumes. Instead, for the trained skirts, I'll use a detachable balayeuse or dust ruffle. But that's another project for another time.

Tuesday, April 29, 2014

Collapsible Bustle Panel Tutorial

Okay so I'm finally getting around to this. One of the things I have done with my recent bustles is I sew a laced panel into the inside of the garment which allows the bustle to then collapse for easier storage (because while we all love big bustles, they do need to go somewhere when not being worn).

To start, I would like to say that I do not know how historically accurate this method is. I know some bustles had tie tapes on the inside and others have the flat panels (which this is an adaption of), but you just don't see the inside of that many bustles - outside of the wire ones - to know what the heck is going on in there. I know that the Laughing Moon Patterns uses a similar method for their bustles, but there are no notes about authenticity in the pattern packet.

 For the adaption, you'll need grommets (I use size 00), a grommet setting device, 1/4" white steel boning or industrial size plastic zip ties, and 2-3 yards of lacing ribbon.

To begin, take the inner support panel from your bustle pattern and mark the exact center.

From the center, add 1 3/4" and mark this new spot.

Now this is the tricky part. You must change the pattern piece to allow for a gap between the two panel pieces once they are laced together. Depending on how much of a gap you want, this will affect your next measurement. For a 1" gap, measure 1/2" from the center. For a 2" gap, measure 1" from the center. Just remember that whatever measurement you choose, it will double the actual gap between the panels.

I DO NOT RECOMMEND LEAVING OUT THIS CENTER GAP SINCE IT DOES NOT ALLOW FOR THE PANEL TO BE ADJUSTED ONCE TIED.

Once you've selected the size of your panel gap, move your center line to this spot, making sure to also move the added 1 3/4" on the side. This is your new pattern piece. To retain the original, trace over it using pattern paper or my personal favorite - wax paper.

Cut two pieces from the pattern, one for each side of the panel. Start by zig-zagging, overlocking, or serging the top and bottom edges of the panel pieces.

Along the center, fold the fabric over 1/4" and iron. Fold over an additional 1 1/2" and iron again. All folds should be made toward the inside, meaning the inner area of the bustle.


 Pin the material in place and stitch 1/8" from the inner edge, then stitch 1/2" from the outside edge. This creates the boning and grommet channels.

Fold up the bottom 1/2 " edge of the panel to the inside, iron, then stitch along overlocked edge.


Repeat these steps on the other panel piece.

With both panel pieces, place them side by side and space out the grommets along the grommet channel (this is the wider one at about 1"). Keep in mind that the top of the panel piece will also be folded over 1/2" as well. My spacing recommendation is about 1"-1 1/4" between each grommet. Mark then attach the grommets using your preferred method.

Once the grommets have been set, take the white steel boning or industrial zip ties and measure then cut them to fit the length of the boning channel. For the zip ties, round and smooth the tips to keep them from poking through the material.


Insert into the channel, fold over 1/2" toward the inside and stitch in place the top of the panel pieces.

 This forms your two panel pieces which you sew into the seams following your regular sewing instructions. Once the bustle is finished, lace the panels together as closely as you desire. When you are ready to store the bustle, simply unlace it.

For larger bustles, you may choose to make two sets of panels to be laced and adjusted separately.


NOTE: Red fabric is from my 1880s Bustle, and purple fabric is from my early 1870s bustle. Some of the photos taken were easier to do with the red bustle.


*          *          *

Feel free to leave any questions you might have and I hope this proves helpful for your bustle projects!

Tuesday, January 21, 2014

1870s Bustle - Purple Madness!

Except for hooks and eyes on the waistband (I have to get more from the store) I am finished with my 1870s Grand Bustle finally!


Despite my fabric shortage issues, everything worked out well and now my grand bustle has become a bodacious purple bustle (cackles in laughter). Once it became apparent that I would have to incorporate a lighter shade of the purple into it, I went with it and had fun.

So not only is there alternating layers of ruffle, but the boning channels are also done in the lighter shade.


And I went ahead and grabbed some ribbon for the inner support panel in the same shade.


It's been a long process from start to finish but I'm very satisfied with the outcome of the project. Definitely looking forward to spring when I might be able to wear it with my Indienne tea dress or maybe I'll just have to start another early bustle dress to wear over it (mwu-ha-ha).


*          *          *


Fabric - Cotton broadcloth in two different shades

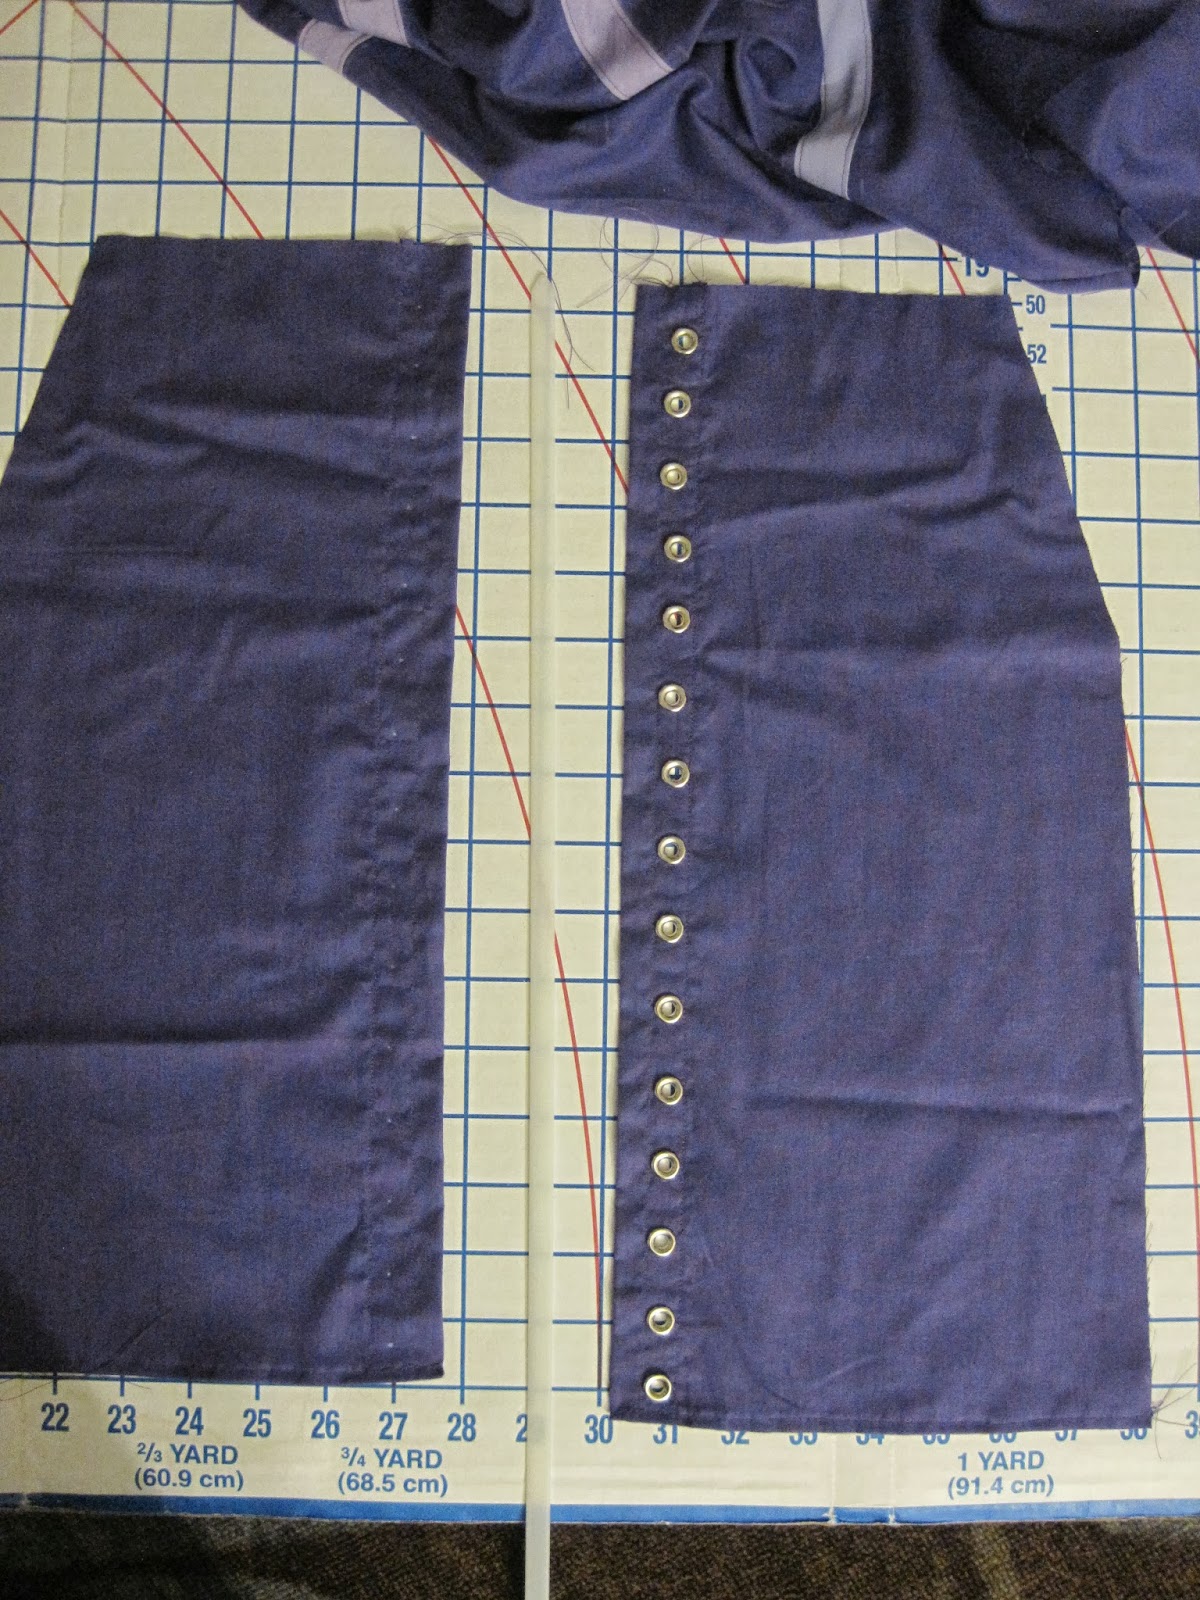
Notions - Grosgrain ribbon, grommets, metal boning, pre-made bias tape, x-large plastic zip-ties, hooks and eyes for closure.

Thursday, December 12, 2013

1870s Bustle Issues

Well I finally got my grommets in and sat down to attach them to the support panels of the bustle.


Then I started to piece together and attach the ruffles to the back of the bustle.


Only to find out that even though I did buy the required amount of fabric, there is not enough for the tiered ruffles that go along the back. I went off to the fabric store to try and pick up some more fabric (I only needed an additional yard) only to find they didn't have anymore of the bright purple fabric I'm using.

On to plan B. Since I have the lighter purple bias tape, I had visited the notion of alternating the strips of ruffle between dark and light purple but didn't want to go through the extra work (Yep, I was feeling lazy). Well now I get to go back to the drawing board and pull up that plan. 

I found a good coordinating fabric, so now I just have to sit down, cut strips, hem them, and then piece back together my dark purple strips of fabric so they fit in the area that I need them. In the end, I think the extra effort will give the bustle a really fun look.

Saturday, October 26, 2013

Finished Indienne Tea Dress

I finally finished my early bustle tea dress a couple days ago, but I'm just now getting to photos and posting them. The weather in Northeast Ohio over the last couple of weeks has been less than ideal so for the moment I only have photos of the dress on Doris the Dressform in some really bad lighting. Maybe next spring I'll get some better photos.


The completed dress with all its new additions. Although it can't be seen, all the interior seams are now overlocked to prevent raveling. The bodice was made using the 1873 Polonaise (TV410) and the Waverly Indienne print fabric.


Detailing of satin ribbon bows that were added to the bodice front and above the elbows on the sleeves. The fringed tassle trim on the peplum is part of the original decoration when it was first made.

View of the demi-train and the back of the overskirt portion of the polonaise. This now sits much better because...

Remember the original skirt and how it hung? I was originally going to add one row of ruffles. Then things got a little out of hand.


Instead I added two ruffles, both seven inches deep, and then a third ruffle, about 2.5 inches deep, along the top to cover the raw edges. While it was it was not in the original plan, I'm glad I added the extra rows. Remember how I had issues with the dress hanging oddly?

Not anymore! Now the dress has the perfect early 1870s silhouette which will probably only get better once I finish my grand bustle. Not to mention it gives it a very lovely, feminine feel.

The skirt was completed using the 1869 Grand Parlor Skirt (TV202). The fabric is a navy shantung silk that has actually been reversed so the wrong side is the only thing you see. Due to early college student budget constraints, I figured this would be easier to do rather than purchase silk outright.

On to the next project! (To be determined

Wednesday, October 2, 2013

1870s Bustle Start

In preparation for going to talk with the American Heritage Girls, I started to whip up a new bustle in case I had extra time to go over the 1870s period with girls (I always like to have extra things to talk about). Besides, it's been on the to-do list as part of the underfrillies overhaul.

I've definitely been in need of a new early bustle for awhile. My original bustle was made using the Truly Victorian Petticoat with Wire Bustle (TV101) and was done during that early "Before I Knew Better" sewing period. While it still looks fairly good -

It's definitely ready to be retired (or at least remade), considering this is how one of the interior bustle tapes is currently being held together.


As I've discovered, the early 1870s skirts need more support so I upgraded and purchased the Truly Victorian Grand Bustle (TV108) pattern. Rather than go with a simple white bustle again, I went through a few online museum collections and Web searches and found some inspiration in this early bustle from the Los Angeles Museum County Museum of Art.

Image via Pinterest
I'm a huge fan of the color purple as well so I found a nice cotton fabric in a semi-bright purple (because that's going to look great under those white petticoats). After cutting everything out, I started on my least favorite task - sewing and overlocking edges on ruffle, 7 yards of it.
I got a lot done actually in one afternoon, including adapting the inner support panel so that it laces and the bustle will collapse.

Marking the back pieces for the wire channels
Adapted panel pieces
Unfortunately, it was getting late and I ended up thwarted by the fact that I ran out of supplies. To finish, I have to get some more grommets but rather than order just grommets, I might as well take advantage of flat shipping and order some other corset and crinoline/bustle supplies that are on the shopping list as well.

Saturday, September 21, 2013

Indienne Tea Dress Upgrade

It feels like it's been forever since I posted anything actually costume related, but there have been other things going on.

I've put aside my underfrillies project for right now and pulled one of my older dresses out of the closet to work on and, ultimately finish. My Indienne tea dress was originally started back in Fall 2010 simply because I was still on my high of getting into historical costuming (it was my second dress). After browsing through Heather's lovely collection of Truly Victorian patterns, I selected the 1869 Grand Parlor Skirt (TV202) and the 1873 Polonaise bodice (TV410) patterns. These were my reasons:
  • I wanted a bustle dress. The bustle dresses were the reason I first fell in love with the Victorian period to begin with, and I wanted a bustle dress dangit!
  • I loved the skirt. It had a train, was ginormous, and did I mention the train? Still rather ignorant of Victorian costume design, all I saw was the word "demi-train" and wanted it.
  • Being a poor college student, the idea of a bodice with the overskirt attached attracted me to the polonaise. It meant I only had to get one pattern rather than two. Ignoring the fact it said for "intermediate to advanced sewers only" I still bought it.

Well I made up both patterns plus the bustle with attached petticoat (TV101), again ignoring recommendations that I make up the larger bustle to support the larger skirt and ended up with this creation - an early 1870s early bustle tea dress.

Ignore the funny look, I was working with a school group when this was taken.
Totally psyched about my second dress coming out much better than my first (we'll revisit that horror story at some point), I wore it and loved it - for the time being.

I pulled the dress back out and wore it to my Dress U conference early this summer. As I pranced around in my lovely dress, I kept looking at it and all I could think was, "It needs more." Gone were my inexperiences of being a newbie sewer. I now had a better working knowledge of the costumes, trims, and the dress styles of the different periods. I wanted to upgrade!

It started right before the Canton Woman's Club Victorian Tea. My biggest gripe was the skirt for the outfit never hung right. It bugged me from day one but I wasn't sure what to do about it. I even sewed a false petticoat/lining underneath originally to help provide a bit of volume and attached a "dust ruffle" to the hem. All it resulted in was the outer layer of shantung silk kept slipping and never stayed in place.

False dust ruffle attached to lining
Note how the skirt just "hangs"
To solve the skirt problem, I decided to add some ruffles. After checking out The Art of Manipulating Fabric and skimming through for some ideas, I went to work. Three days before the Woman's Club tea I started, and it went downhill from there. Original plan, add one tier of ruffles to stiffen and weigh down the hem to make it hang correctly. End result - well let's just say it definitely wasn't what I had planned.


Ruffle work in progress. All my ruffles I usually gather by hand and pin.
While the skirt ruffling is done, now it's been a matter of flushing out small touches on the bodice. For example, after making my new corset, the bodice fits differently now. Because I am unable to adjust seams without taking the entire thing apart, I readjusted the placement of some of the buttons instead.


The top button ended up being moved almost two inches. Whoa!
And now that I'm in that whole, trim-is-an-awesome-thing-the-more-the-better, mindset, I decided to make a few bows for the dress as well. They'll be sewn to the center front of the bodice and at the top of the sleeve flare above the elbow.


Well before I even get started on the sleeve bows though, I had one other small task. As a newbie, I never gave the idea of serging a second thought. As an experienced sewer now, I mentally kick the 2010 version of myself in the posterior. Rather than hand sew all of those edges or be super lazy and fray check it, I did the unthinkable, I removed the sleeves of the bodice to overlock stitch them.

Removing the sleeves after 3 years
While it has still been awkward getting everything through the sewing machine, it's been going much faster than hand sewing (and we all know how much I hate that) and provides for a cleaner, finished product.


If you look at the photo, the fabric edges on the right are overlocked while the two on the left are not. It's not very clear, but you still see a difference in the smoother edges of the overlocked fabric. Anything I can't overlock stitch gets a bit of fray check just to keep everything from raveling. There's also a little bit of tacking to do in various areas and then hopefully it will be finished.

Now I'm sure there are a couple of people scratching their heads going, "Wasn't it finished before? You've already worn in and now you're just making changes."

This is my clarification. The Indienne tea dress has sat in an extended state of being Done. "Done" means it may not be finished, but it is wearable. I've always known that I would probably be making changes to this dress at some point once I learned a bit more in the trims department. "Finished" means the dress is not only wearable, but will most likely not have any further changes made to it either. Once I make the changes mentioned in this post, there are no other changes I see myself wanting to make and will therefore add it to the Finished costume category.

I will add though that if you talk to most costumers, there is no such thing as ever being "finished" with anything.