So I finished a project that was probably my quickest project to date. Two hours total!
Since my Regency dress is coming along so well, I'm now going on a Regency project binge. On the list of things I'm starting to brainstorm and put together to go with the dress are:
- a shawl
- chemisette
- bonnet
- petticoat
- stays (on-going WIP)
The shawl came first because I remembered a shawl hack that Jen from Festive Attyre had put together a while ago. Following her tutorial, I first started on ebay and selected a dark navy shawl that would go well with the red and matched a bonnet I started eons ago. Per the instructions, I purchased two of the shawls. I couldn't find the actual fiber content but at $7 a piece, I'm guessing it's a synthetic blend of some type.
These were just basic pashmina scarves and nothing too fancy. True Regency scarves, from what I can tell, are the same color on both sides of the shawl, excluding the paisley design areas. These are navy blue on one side, gold and red on the reverse due to the weave pattern of the threads.
When selecting a scarf for this project, you have to make sure that it has a border pattern with nothing in the middle. If there is a center pattern, the scarves won't match. Mine did have a pattern woven along the edge, but it still left lots of room for the eventual butchering. The reason for this is because the scarves are joined together to make one giant one.
I sewed the two shawls together first, rather than cutting them. Lining up the edge pattern, I then did a straight seam across the width of the scarf. My scarves had PASHMINA labels glued on them so I positioned the scarves so that these ends with the labels would be cut away.
Following the seam line, I used the pinking shears to cut about 1/4" away from seam on one side. On the second side, I used regular scissors to cut about 1" from the seam.
Folding the longer edge over the pinked edge, I hand stitched a flat fell seam to cover the raw edges and keep the joined scarves flat.
 |
| Flat fell seam on the correct side - note the pattern matching |
 |
| Back of shawl with hand stitched flat fell seam |
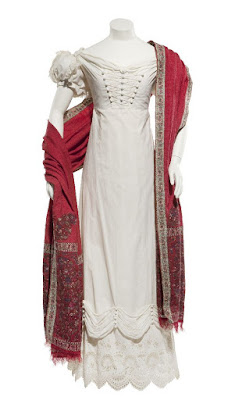
Again, the whole project only took about 2 hours to complete. I went from having two scarves that started at 29" X 68" each, and now the entire thing is a whopping 118" long! It definitely has that nice trailing Regency shawl vibe (I'm currently sitting with it wrapped around me as I write this!). Here's a couple examples just to give you an idea.
Unfortunately, we had rain all day so outdoor shots were not an option. Instead, I got Kerry to catch a couple quick shots indoors this evening. Please excuse the poor lighting and Daisy the dog trying to get in the shots.
Once everything is completely done - dress and accessories - I'll make sure to get everything photographed together. Stay tuned for for more updates on this growing costume project!
* * *


No comments:
Post a Comment